Overview of Remastering Elements
This project will cover how we designed and developed an algorithm to remaster songs, primarily with a focus on songs that have a lot of elements that make the end result noisy and not as pleasant to listen to. To achieve this goal, we first filter out the initial noise as well as some of the unwanted low and high frequency components that lead to effects such as clipping or distortion. From there we then apply a nonlinear homomorphic filter to filter out crowd noises, hisses, pops, etc. After that we apply a sharpening filter to make the music sound better and to eliminate the dullness introduced by the recording methods. To fine tune the song before output, we put it through an equalizer, and from there we have a remastered song. A block diagram/flowchart depicting our algorithm is shown below:
Note that as we can see in the can see in the block diagram, when we get to the homomorphic filter, we can either use either a sample of the song being remastered or a separate reference song that we want to sharpen using Audacity, Adobe Audition, or some other audio editing software. Once we have applied filters to the reference, we can then apply those exact same filters to a delta function to obtain an impulse response h[n] that we can then feed back into the sharpening filter to sharpen the total song.
At the end of this page you can find a GitHub repo that contains the complete set of code as well as a few demo reels and a few sample sharpening impulse response functions. A demo of our code can be heard on the results page. For more audio to experiment with, we used songs from the library of congress (https://www.loc.gov/), which can be easily downloaded as data sets from the library of congress Citizen DJ webpage (https://citizen-dj.labs.loc.gov/) and can be manipulated using our code.
Initial Filtering:

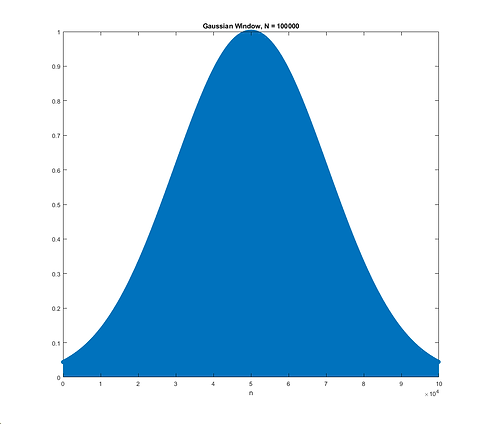
The first portion of filtering we have implemented is a combination of first a Gaussian filter and then either a low pass filter or a spectrum amplitude filter followed by a high pass filter. The purpose of the Gaussian filter is to significantly reduce the white noise by either reducing or amplifying frequencies in the frequency domain that correspond to white noise. Ideally we want as wide of a gaussian window as we can get as to eliminate as much white noise as possible. Below we can see a Gaussian window in both the time and frequency domain. Note the frequency domain plot is in a semi-log form.
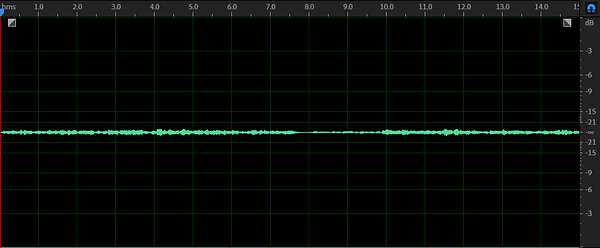
The purpose of the low pass/spectrum amplitude filter is to reduce the portions of the frequency spectrum that are too weak or correspond to frequencies that are too high. These pieces can be observed in the magnitude FFT plot of the demo song, where they are the stems close to the center of the plot. The final stage, a high pass filter, is designed to remove the DC frequency offsets that causes clipping and other problems. Below we can see a gaussian filtered signal in the time domain that shows the DC offset that needs to be removed
As we can see, the AC portion of the signal follows an arcing path. Ideally the signal would have an average at the -infinity mark. To do this we remove the low frequencies (< 50-100 Hz), which results in a signal shown below.
One thing to note is that because the gaussian window is variable, the audio being filtered has to be stitched together by shifting the audio, which results in a spike where the clips are joined. This "pop" sound at every N/2 interval, where N is the gaussian window size, will be filtered out in the homomorphic filter stage, which is performed next before sharpening.


Nonlinear Homomorphic Filter
Normal digital filtering that we applied before is only linear and cleans out noise signals that are sums of harmonic oscillations. In the case of when background noise is convolved or multiplied into the desired signal, the frequency of the noise we want to get rid of is the same as the desired signal so linear filtering will not be able to catch or get rid of these noises. For that reason, we need to find a nonlinear method to filter out this noise and we have decided to use homomorphic filtering. The word homomorphic means “same structure” and the idea is to turn the nonlinear problem into the same structure of a linear problem so we can handle it in the same way.
Homomorphic Filtering Process
An audio signal with this kind of noise will take the form of s(t) = a(t) * n(t) where s(t) is the total signal, a(t) is the desired audio signal, and n(t) is the noise we want to filter out.
The first step to handling this convolution is to turn it into a multiplication by applying the Fourier transform to express it in the frequency domain since convolution in the time domain is multiplication in the frequency domain: S(t) = A(t) x N(t).
Once in this multiplicative form, we turn the relation linear by applying logarithm to the multiplied signals and the properties of log results in: log( A(⍵) N(⍵) )=log( A(⍵) )+log( N(⍵) ). We then have to scale everything to account for the logged magnitude.
In this form we can apply a linear filter to filter out the noise portion of this logarithmic sum: log( A(⍵) )+log( N(⍵) )-log( N(⍵) ) = log( A(⍵) ).
We decided on using a Chebyshev filter as it is faster than the windowed-sinc, while still effectively filtering out clicks and pops with its sharp transition band, as well as a ripple of lesser amplitude than most other filters.
High-Pass Chebyshev Filter
Once we reach this final logarithm, we can reconstruct to get our final cleaned up audio signal back in the time domain by applying inverse logarithm and inverse Fourier transform: log( A(⍵) ) = log^(-1) [log( A(⍵) )] = A(⍵) Ƒ^(-1)[A(⍵)] = a(t).
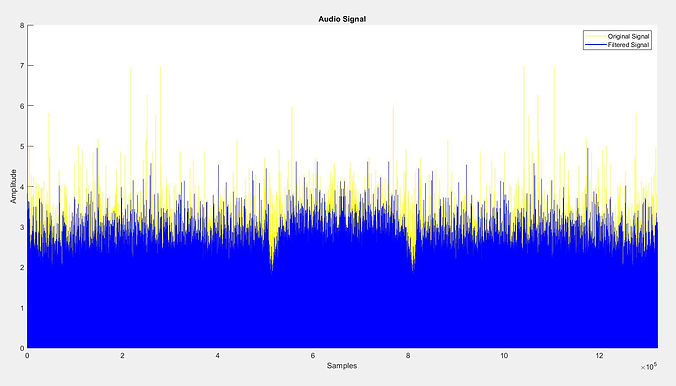
Plot of Resultant Signal over Original Signal


Impulse Response Sharpening
As discussed in our initial project progress report, the original plan was to take a sample of our song, sharpen it, and attempt to build a mapping in the frequency domain from dull to sharp. While in theory this could work if the frequency content of the song snippet being sharpened was representative of the whole song, the implementation ended up being too difficult to get working. As this initial plan to model a transfer function was not entirely successful and ran into numerous problems, we decided to change the sharpening solution to using an impulse response characterized by the sharpening filters used on the song in Adobe Audition. Not only does this result in a linear filter, but it allowed us to quickly classify the sharpening process without any lengthy code, and also provided us with a generalizable sharpening mapping that can be used on songs with similar instruments and of a similar genre(blues, classical, etc). Below we can see a diagram that shows how this works:
As we can see, the first step in sharpening the track is to first select a reference track from either a portion of the song or from a similar song and sharpen it using an audio editing suite. For our purposes Adobe Audition worked very well. We then use the filtering elements used on the reference track and apply them to a delta function δ[n] to get the impulse response h[n]. Note that the delta function δ[n] should ideally have a length that is the same as the length of the full song, however there are correction features present in the MATLAB function in case the lengths of the delta function and the song do not match. From there we input the impulse response h[n] and the noise filtered song x[n] in the MATLAB function named 'Sharpening_Filter' to then get the sharpened song y[n].
.png)
Equalizer
After our sharpening and noise filtering, some small final adjustments may need to be made. We have created an interface so that a user or sound engineer could make these adjustments manually. The equalizer's implementation follows the diagram below.

We take the inputted song and pass it through a filter (the diagram has a lowpass filter, but this could be any filter). This filter is an FIR filter that targets a specific frequency band. We have filters designed for the following frequency bands: 0-20 Hz, 20-60 Hz, 60-200 Hz, 200-600 Hz, 600-3000 Hz, 3000-8000 Hz, and all frequencies greater than 8000 Hz. With the filtered input, it is multiplied by a positive or negative gain and we add it back to the original song to produce amplification or attenuation at the desired frequencies.
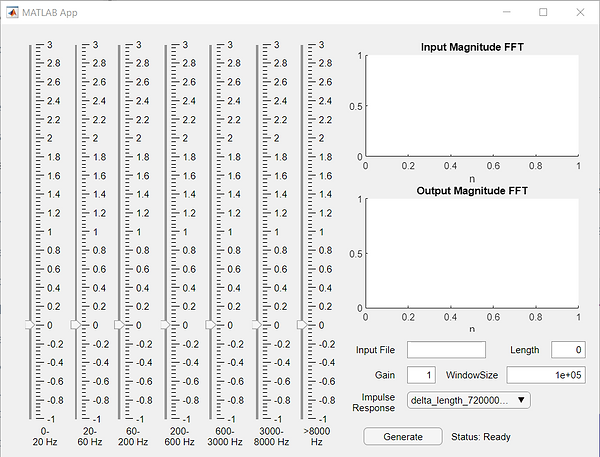
The following figure is a screenshot of the user interface. There are sliders for each frequency band where the user can adjust the gain amplification or attenuation for the corresponding filter. The user can also select which impulse response mode to use for the sharpening filter. We also have options to adjust the window size, length, and overall gain amplification for the output.

Output, Final Notes
For the equalizer, we originally planned to test multiple implementations to see which implementation worked best for our purposes. Unfortunately, we were not able to implement and test other versions of the equalizer. If we had more time, we would like to be able to test other implementations and pick the one that worked the best. One strength of the equalizer used for this project is that it is relatively simple. However, one weakness is that because it is just adding the filtered signal back, if the undesired frequencies are not attenuated enough, those frequencies could also be amplified or attenuated more than intended.